Do you share this frustration? After using IKEA furniture for several years, although durable, it looks ordinary and lacks personality. I understand your feelings because I've experienced the same concerns. As a DIY renovation enthusiast, I'll share several secret weapons to give your IKEA furniture a fresh look. I've personally tried all these solutions - they not only enhance your home's appearance but also won't break the bank. Honestly, I initially thought furniture renovation would be very troublesome, but once you start trying, you'll find the process quite enjoyable and fulfilling.
Remember my first experience using paint to transform furniture? It was an unused white BILLY bookcase that looked lifeless. I thought, why not give it a makeover? I immediately started my first renovation attempt.
My first suggestion is: buy small test cans of paint to experiment. I used six 350ml paint cans to create a landscape painting on the bookcase's back panel. The process truly amazed me as I discovered my artistic talent. Do you know the benefits of this approach? It's not only cost-effective but also allows you to boldly try different creative ideas. For instance, you can experiment with gradients, geometric patterns, or even playful illustrations on a wall.
Regarding paint selection, I recommend choosing eco-friendly water-based paint. Although it might be more expensive than regular paint, it has almost no harsh odors and is better for both human health and the environment. During my first painting experience, due to inexperience, I bought regular paint, resulting in strong odors throughout the room that took several days to dissipate.
Before starting, thorough preparation is essential. First, thoroughly clean the furniture surface and sand it down so the paint adheres better. Second, lay newspapers or protective cloth on the floor to prevent paint drips. Finally, remember to wear a mask and gloves for protection.
My first attempt was painting a simple landscape on the bookcase's back panel. Honestly, I was very nervous at first, worried it wouldn't look good. But once I started, I found it wasn't that difficult. I used three different shades of blue for a gradient from top to bottom, then outlined distant mountains in white. The final result was surprisingly good - friends said it didn't look DIY at all.
Later, I tried many different creative ideas. For example, I decorated wardrobe doors with geometric patterns and transformed children's storage cabinets with cartoon designs. Each attempt brought different surprises. I discovered that we often underestimate our creativity - as long as we dare to try, we can create stunning works.
Speaking of BILLY bookcases, they're absolute stars in the renovation world. I recently helped a friend transform her BILLY bookcase into a super high-end looking built-in bookshelf. This renovation project gave me particular satisfaction because the final result exceeded everyone's expectations.
How did we do it? First, we spent a lot of time on measurement and planning. You know, for a successful renovation project, preliminary preparation accounts for at least 50% of importance. We carefully measured the wall dimensions, considered ceiling height, and even checked if the floor was level.
Then, we secured the bookcase to the wall. This step seems simple but requires precision. We used special expansion bolts to ensure the bookcase was firmly fixed to the wall. Remember, a bookcase full of books is quite heavy. At the top, we added a wooden board extending to the ceiling to perfectly fill the gap between the bookcase and ceiling. We did the same treatment on both sides, making the entire bookcase look like custom-built furniture.
The finishing touch was paint. We chose paint that exactly matched the wall color, making the bookcase blend perfectly with the wall. You wouldn't believe this renovation cost less than $500, but it looks like custom-built shelving. When friends visit, they think it's custom-made furniture that cost tens of thousands.
During this process, I learned an important lesson: renovation doesn't necessarily require major changes; sometimes attention to small details can bring unexpected results. For instance, we installed LED light strips under each shelf, making the entire bookcase look like an art piece when lit at night.
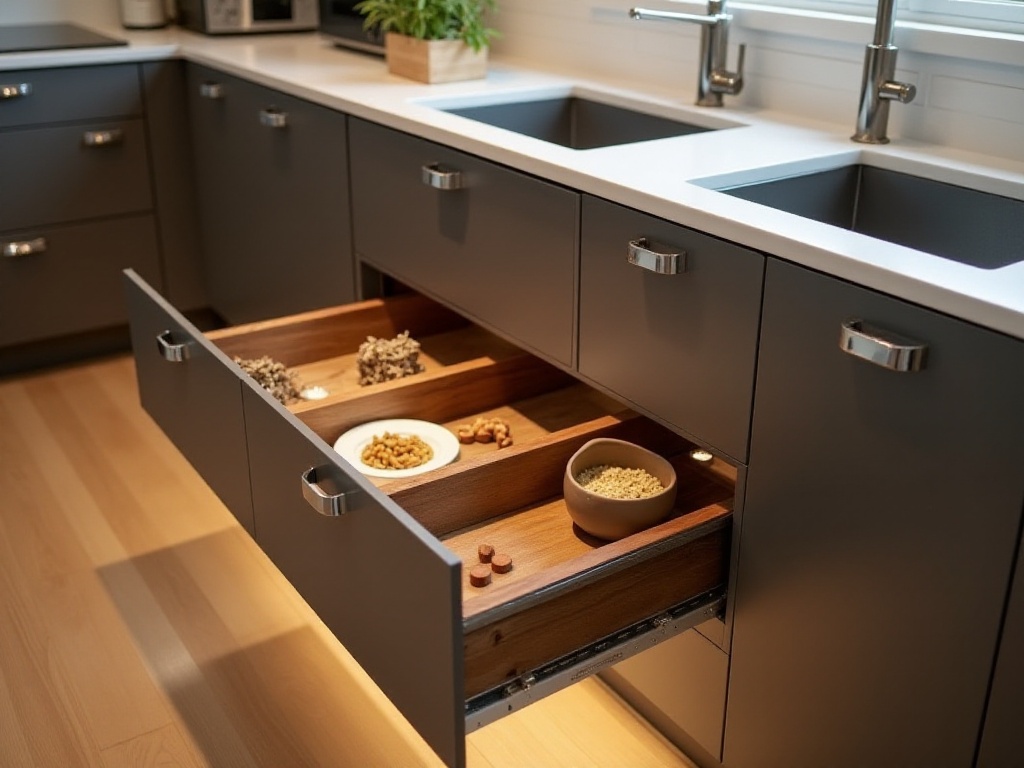
Kitchen space is never enough, right? But the solution is right under your feet. I recently did a super practical renovation: transforming the bottom kitchen cabinet into a pet-dedicated area. This idea actually came from my frustration with my Corgi making a mess with food everywhere.
The renovation process wasn't complicated but required careful planning. First, we needed to determine where to store pet food and supplies. I divided the original drawer into upper and lower sections, using the upper part for dog and cat food, and converting the lower part into a retractable feeding bowl rack.
To perfect this renovation, I added waterproofing around the feeding bowl rack so that water splashes wouldn't damage the cabinet. I also installed a deodorizer in the drawer to prevent pet food odors.
What delighted me most about this renovation was its practicality. Now my Corgi eats much more elegantly because the feeding bowl height is perfect - no more bending down to eat. Plus, food and water don't spill everywhere anymore, making cleanup much easier.
This renovation taught me an important lesson: sometimes we need to think from a different perspective. Initially thinking the kitchen lacked space, we found a win-win solution by considering our pet's perspective.

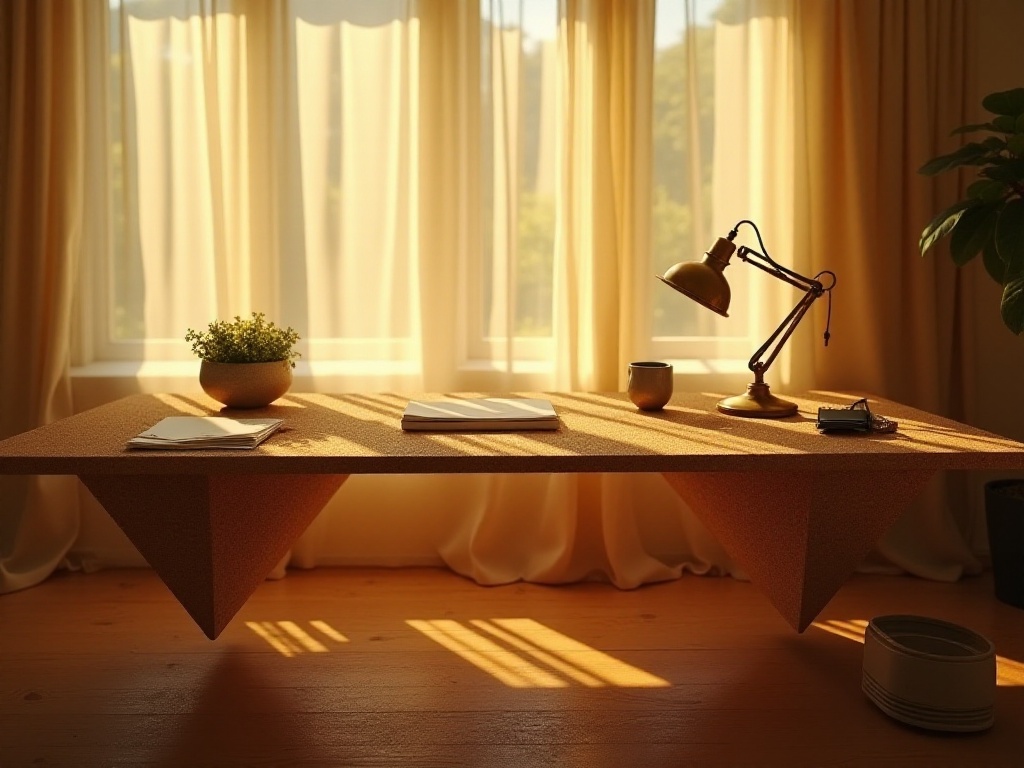
Speaking of storage, I recently discovered an amazing material - cork sheets. This discovery was completely accidental. Once when my desk got marked by a hot coffee cup, I was really frustrated. But this accident led me to discover the magic of cork sheets.
Cork sheets have so many benefits. First, their texture is warm and natural, feeling very pleasant to touch. Second, they have excellent heat insulation properties, so no more worrying about hot coffee cups leaving marks. Most importantly, they're very easy to clean and maintain - just wipe with a damp cloth.
Later, I covered the entire desk surface with cork sheets, not only perfectly hiding the stains but also making the whole office environment look particularly warm and natural. This renovation gave me great inspiration: sometimes a small accident can bring unexpected ideas.
Besides the desk, I've used cork sheets in many places. For example, I used them to decorate the entrance shoe cabinet, which not only looks good but also prevents shoes from scratching the cabinet. I also made a message board with cork sheets, and seeing warm messages from family members every morning makes me feel especially good.
If you want to make your home look good without spending too much, the secondhand market is definitely your friend. Honestly, I was initially resistant to secondhand furniture, thinking it wouldn't be clean or new enough. But after several attempts, I completely changed my mind.
Just last week, I found a vintage dining table on Xianyu for only 300 yuan. Although this table has some age to it, the material is excellent - it's solid wood. After a coat of paint, it looks no different from tables selling for 3000 yuan in stores.
When shopping in the secondhand market, patience is key. I usually make a list in advance of what kind of furniture I want. Then I check daily to see if there's anything suitable. When contacting sellers, be sure to ask detailed questions about the furniture's condition, preferably requesting multiple photos, especially of the details.
Also, prices are negotiable. But note that if you find an item you really like, don't miss out over a difference of a few dozen yuan. After all, good items are relatively rare.

Through years of renovation experience, I increasingly feel that home renovation isn't about how much budget you have, but how much creativity and thought you're willing to invest. Like the BILLY bookcase I mentioned earlier, what matters isn't how ordinary it was originally, but what kind of imagination you use to make it unique.
Every time I see a completed renovation project, I feel a special sense of achievement. Because it's not just about changing the appearance of furniture, but making the entire home more vibrant. I've found that when we put our hearts into renovating furniture, we're actually creating our own lifestyle.
Sometimes friends say I'm really into "tinkering," but I think this kind of "tinkering" is actually enjoyable. Through hands-on renovation, we not only save on decoration costs, but more importantly, we make every piece of furniture in our home tell its own story.
Do you have similar renovation experiences? Or are you feeling eager to give your home a makeover now? Don't worry too much about failing, because everyone starts from zero. What's important is daring to try and believing in your creativity.
Remember, every home can be unique - the key is taking that first step. Next week I'll share more interesting renovation cases, and we can exchange experiences and learn from each other then. I believe that through our collective efforts, we can make every home unique.
 Previous